Modern React testing, part 3: Jest and React Testing Library
November 2022 Updated to React Testing Library 10. Replaced Nock with Mock Service Worker. Replace node-fetch with whatwg-fetch.
August 2020 Updated to the latest Testing Library best practices and recommendations.
March 2020 Updated to React Testing Library 10 and DOM Testing Library 7.
React Testing Library is a library to test React components, that makes applying testing best practices, we’ve learned in the first article, natural.
This is the third article in a series, where we learn how to test React components with Jest and React Testing Library.
- Modern React testing, part 1: best practices
- Modern React testing, part 2: Jest and Enzyme
- Modern React testing, part 3: Jest and React Testing Library (this post)
- Modern React testing, part 4: Cypress and Cypress Testing Library
Examples Check out the GitHub repository with all the examples.
Getting started with Jest and React Testing Library
We’ll set up and use these tools:
- Jest, a test runner;
- React Testing Library, a testing utility for React;
- jest-dom, Jest matchers for testing the DOM;
- @testing-library/user-event, testing user events.
- Mock Service Worker, mocking network.
Why Jest and React Testing Library
Jest has many benefits over other test runners:
- Very fast.
- Interactive watch mode that only runs tests which are relevant to our changes.
- Helpful failure messages.
- Simple configuration, or even zero configuration.
- Mocks and spies.
- Coverage reports.
- Rich matchers API.
React Testing Library has many benefits over Enzyme:
- Much simpler API.
- Convenient semantic queries (like form label, image alt, ARIA role).
- Async queries and utilities.
- Better error messages.
- Easier setup.
- Libraries for other frameworks with the same queries.
- Recommended by React team.
React Testing Library helps us write good tests and makes writing bad tests difficult. It allows us to find elements in a way similar to how a user would do that: for example, find form elements and buttons by their labels.
Setting up Jest and React Testing Library
First, install all the dependencies, including peer dependencies:
npm install --save-dev jest jest-environment-jsdom whatwg-fetch msw @testing-library/react @testing-library/jest-dom @testing-library/user-eventSome of these modules aren’t required for React Testing Library but we’ll use them in the article:
- jest-dom makes tests more readable by adding useful assertions.
- @testing-library/user-event makes testing user interaction closer to how an actual user would interact with the app.
- msw is a great way to test component that make network requests.
We’ll also need babel-jest for Babel or test environment in the Babel config.
Update the package.json like this:
{
  "name": "pizza",
  "version": "1.0.0",
  "dependencies": {
    "react": "18.2.0",
    "react-dom": "18.2.0"
  },
  "devDependencies": {
    "@testing-library/jest-dom": "5.16.0",
    "@testing-library/react": "13.4.0",
    "@testing-library/user-event": "14.4.0",
    "jest": "29.2.0",
    "jest-environment-jsdom": "29.2.0",
    "msw": "0.47.0",
    "whatwg-fetch": "3.6.0"
  },
  "scripts": {
    "test": "jest",
    "test:watch": "jest --watch",
    "test:coverage": "jest --coverage"
  },
  "jest": {
    "setupFiles": ["whatwg-fetch"],
    "setupFilesAfterEnv": ["@testing-library/jest-dom/extend-expect"],
    "testEnvironment": "jest-environment-jsdom"
  }
}
The setupFiles option tells Jest to load whatwg-fetch, otherwise any call to the fetch() will fail.
The setupFilesAfterEnv option tells Jest to load jest-dom matchers.
The testEnvironment option tells Jest to load jest-environment-jsdom that adds support for browser APIs.
Tip Two ESLint plugins eslint-plugin-testing-library and eslint-plugin-jest-dom helps to avoid common mistakes when using the Testing Library. Many of their rules are fixable.
Creating our first test
The best location for a test is close to the source code. For example, if we have a component at src/components/Button.js, a test for this component could be at src/components/__tests__/Button.spec.js. Jest will find and run this file automatically.
So, let’s create out first test:
import React from 'react';
import { render, screen } from '@testing-library/react';

test('hello world', () => {
  render(<p>Hello Jest!</p>);
  expect(screen.getByText('Hello Jest!')).toBeInTheDocument();
});
Here we’re rendering a paragraph of text using the Testing Library’s render() method, then testing that a paragraph containing “Hello Jest!” is present on the page using Testing Library’s getByText() method and jest-dom’s toBeInTheDocument() matcher.
We’re also using the screen namespace to access the queries.
Running tests
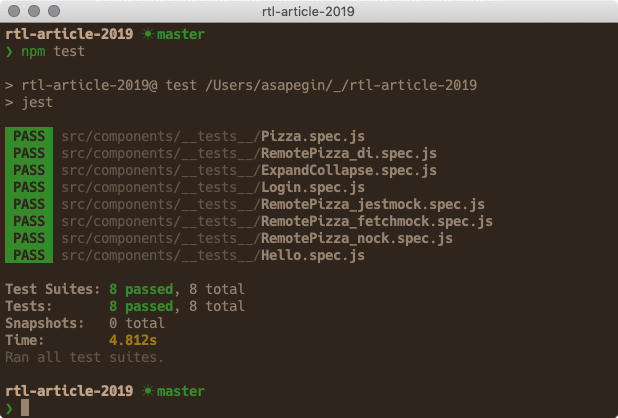
Run npm test (or npm t) to run all tests. We should see something like this:
Run npm run test:watch to run Jest in watch mode: Jest will run only tests that are related to files changed since the last commit, and Jest will rerun these tests any time we change the code. This is how I usually run Jest. Watch mode is fast enough even on large projects, where running all tests takes many minutes.
Run npm run test:coverage to run all tests and generate coverage report in the coverage folder.
Snapshot testing
Jest snapshots work like this: we tell Jest that we want to be sure that output of this component should never change accidentally and Jest saves the component output, called a snapshot, to a file:
exports[`test should render a label 1`] = `
<label
  className="isBlock">
  Hello Jest!
</label>
`;
Every time someone changes the markup, Jest shows a diff and asks whether to update a snapshot, if the change isn’t accidental.
We can use snapshots to store any values: React tree, strings, numbers, object, etc.
Snapshot testing sounds like a good idea, but has several problems:
- easy to commit snapshots with bugs;
- failures are hard to understand;
- a small change can lead to hundreds of failed snapshots;
- we tend to update snapshots without thinking;
- coupling with low-level modules;
- test intentions are hard to understand;
- they give a false sense of security
- they don’t prove that the app work or even look as exepected.
Avoid snapshot testing except testing short output with clear intent, like class names or error messages, or when we really want to verify that the output is the same.
To keep snapshots short, prefer toMatchInlineSnapshot() over toMatchSnapshot().
For example, instead of snapshotting the whole component output:
test('shows out of cheese error message', () => {
  const { container } = render(<Pizza />);
  expect(container.firstChild).toMatchSnapshot();
});
Only snapshot a part we’re interested in:
test('shows out of cheese error message', () => {
  render(<Pizza />);
  const error = screen.getByRole('alert').textContent;
  expect(error).toMatchInlineSnapshot(`Error: Out of cheese!`);
});
Querying DOM elements for tests
Tests should resemble how users interact with the app. That means we shouldn’t rely on implementation details because the implementation can change and we’ll have to update our tests. This also increases the chance of false positives when tests are passing but the actual feature is broken.
Let’s compare different methods of querying DOM elements:
| Selector | Recommended | Notes |
|---|---|---|
button | Never | Worst: too generic |
.btn.btn-large | Never | Bad: coupled to styles |
#main | Never | Bad: avoid IDs in general |
[data-testid="cookButton"] | Sometimes | Okay: not visible to the user, but not an implementation detail, use when better options aren’t available |
[alt="Chuck Norris"], [role="banner"] | Often | Good: still not visible to users, but already part of the app UI |
[children="Cook pizza!"] | Always | Best: visible to the user part of the app UI |
To summarise:
- Text content may change and we’ll need to update our tests. This is good: we want our test to work with the actual text users see in the app.
- Test IDs clutter the markup with props we only need in tests. Test IDs are also something that users of our app don’t see: if we remove a label from a button, a test with test ID will still pass.
Testing Library has methods for all good queries, they are called sematic queries. There are six variants of query methods:
getBy*()returns the first matching element and throws when an element not found or more than one element found;queryBy*()returns the first matching element but doesn’t throw;findBy*()returns a promise that resolves with a matching element, or rejects when an element not found after a default timeout or more than one element found;getAllBy*(),queryAllBy*(),findAllBy*(): same as above but return all found elements, not just the first one.
And the queries are:
getByLabelText()finds a form element by its<label>;getByPlaceholderText()finds a form element by its placeholder text;getByText()finds an element by its text content;getByAltText()finds an image by its alt text;getByTitle()finds an element by itstitleattribute;getByDisplayValue()finds a form element by its value;getByRole()finds an element by its ARIA role;getByTestId()finds an element by its test ID.
Each query is available in all variants. For example, besides getByLabelText() there are also queryByLabelText(), getAllByLabelText(), queryAllByLabelText(), findByLabelText() and findAllByLabelText().
Let’s see how to use query methods. To select this button in a test:
<button data-testid="cookButton">Cook pizza!</button>We can either query it by its test ID:
render(<Pizza />);
screen.getByTestId('cookButton');
Or query it by its text content:
render(<Pizza />);
screen.getByText(/cook pizza!/i);
Note the regular expression (/cook pizza!/i) instead of a string literal ('Cook pizza!') to make the query more resilient to small tweaks and changes in the content.
Or, the best method, query it by its ARIA role and label:
render(<Pizza />);
screen.getByRole('button', { name: /cook pizza!/i });
Benefits of the last method are:
- doesn’t clutter the markup with test IDs, that aren’t perceived by users;
- doesn’t give false positives when the same text is used in non-interactive content;
- makes sure that the button is an actual
buttonelement or at least have thebuttonARIA role.
Check the Testing Library docs for more details on which query to use and inherent roles of HTML elements.
Testing React components
Testing rendering
These tests can be useful when our component has several variations and we want to test that a certain combinnation of props renders the correct variation.
import React from 'react';
import { render, screen } from '@testing-library/react';
import Pizza from '../Pizza';

test('contains all ingredients', () => {
  const ingredients = ['bacon', 'tomato', 'mozzarella', 'pineapples'];
  render(<Pizza ingredients={ingredients} />);

  for (const ingredient of ingredients) {
    expect(screen.getByText(ingredient)).toBeInTheDocument();
  }
});
Here we’re testing that our Pizza component renders all ingredients passed to a component as a prop.
Testing user interaction
To simulate user interaction, like clicking or typing, use user-event methods, and then test the output:
import React from 'react';
import { render, screen } from '@testing-library/react';
import userEvent from '@testing-library/user-event';
import ExpandCollapse from '../ExpandCollapse';

test('button expands and collapses the content', async () => {
  const user = userEvent.setup();

  const children = 'Hello world';
  render(
    <ExpandCollapse excerpt="Information about dogs">
      {children}
    </ExpandCollapse>
  );

  expect(screen.queryByText(children)).not.toBeInTheDocument();

  await user.click(screen.getByRole('button', { name: /expand/i }));

  expect(screen.getByText(children)).toBeInTheDocument();

  await user.click(screen.getByRole('button', { name: /collapse/i }));

  expect(screen.queryByText(children)).not.toBeInTheDocument();
});
Here, we have a component that shows some text on the “Expand” button click, and hides it on the “Collapse” button click. Our test verifies this behavior.
We’re using queryByText() method instead of getByText() because the former doesn’t throw when an element can’t be found, so we can test that an element doesn’t exist.
See the next section for a more complex example of testing events.
Testing event handlers
When we unit test a single component, event handlers are often defined in the parent component, and there are no visible changes as a reaction to these events. They also define the API of a component that we want to test.
jest.fn() creates a mock function, or a spy, that allows us to check how many times it was called and with which parameters.
import React from 'react';
import { render, screen } from '@testing-library/react';
import userEvent from '@testing-library/user-event';
import Login from '../Login';

test('submits username and password', async () => {
  const user = userEvent.setup();
  const username = 'me';
  const password = 'please';
  const onSubmit = jest.fn();

  render(<Login onSubmit={onSubmit} />);

  await user.type(screen.getByLabelText(/username/i), username);

  await user.type(screen.getByLabelText(/password/i), password);

  await user.click(screen.getByRole('button', { name: /log in/i }));

  expect(onSubmit).toHaveBeenCalledTimes(1);
  expect(onSubmit).toHaveBeenCalledWith({
    username,
    password
  });
});
Here, we’re using jest.fn() to define a spy for the onSubmit prop of our Login component, then we’re filling the form by typing text into input fields, then we click the submit button, and check that the onSubmit function was called only once and it has received login and password.
In comparison to Enzyme, we don’t have to call a form submit handler directly, which would be testing the implementation. User-event’s click() method will dispatch a click event on the DOM node which is captured and handled by React the same way a real click in a browser would be handled. For example, it will dispatch a form submit event when we “click” a <button type="submit">, and won’t dispatch it when we “click” a <button type="button">, which makes our tests more reliable.
Async tests
Asynchronous operations are the most tricky to test. Often developers give up and add random delays to their tests:
const wait = (time = 0) =>
  new Promise(resolve => {
    setTimeout(resolve, time);
  });

test('something async', async () => {
  // Run an async operation...
  await wait(100).then(() => {
    expect(screen.getByText(/done!/i)).toBeInTheDocument();
  });
});
This approach is problematic. The delay will always be a random number. A number that is good enough on a developer’s machine at the time of writing the code. But it can be too long or too short at any other time and in any other environment. When it’s too long, our tests will run longer than necessary. When it’s too short, our tests will break. This makes tests flaky.
A better approach would be polling: waiting for something, like a new text on a page, by checking it multiple times with short intervals, until it’s there. Testing Library has the waitFor() method:
import { waitFor } from '@testing-library/react';

test('something async', async () => {
  await runAnAsyncOperation();

  await waitFor(() => {
    expect(onUpdate).toHaveBeenCalledTimes(1);
  });
});
For querying elements we can use findBy*() and findAllBy*() methods that could wait for an element to appear:
test('something async', async () => {
  await runAnAsyncOperation();

  expect(await screen.findByText(/done!/i)).toBeInTheDocument();
});
Now our tests wait as long as necessary but not more.
waitForElementToBeRemoved() is another useful method: it waits until an element is removed from the DOM.
See the next section for more realistic examples.
Testing network requests and mocks
There are many ways to test components that send network requests:
- dependency injection;
- mocking a service module;
- mocking a high-level network API, like
fetch; - mocking a low-level network API, that catches all ways of making network requests;
- starting a mock server and sending requests to this server instead of a real API.
I’m not mentioning sending a real network request to a real API as an option here, because it’s slow and fragile. Every network problem or change of the data, returned by the API, may break our tests. Also, we’ll need to have the right data for all test
Let’s look at some of the methods in more detail.
Dependency injection is when we pass a dependency as a function parameter or a component prop, instead of hardcoding it inside of a module. This allows us to pass another implementation in a test. Use default function parameters or default component props to define the default implementation, one that should be used in non-test code. That way we don’t have to pass the dependency every time we use a function or a component:
import React from 'react';

const defaultFetchIngredients = () =>
  fetch('https://...').then(r => r.json());

export default function RemotePizza({
  fetchIngredients = defaultFetchIngredients
}) {
  const [ingredients, setIngredients] = React.useState([]);

  const handleCook = () => {
    fetchIngredients().then(response => {
      setIngredients(response.args.ingredients);
    });
  };

  return (
    <>
      <h3>Pizza</h3>
      <button onClick={handleCook}>Cook</button>
      {ingredients.length > 0 && (
        <ul>
          {ingredients.map(ingredient => (
            <li key={ingredient}>{ingredient}</li>
          ))}
        </ul>
      )}
    </>
  );
}
When we use our component without passing the fetchIngredients prop, it’ll use the default implementation, that makes an actual network request:
<RemotePizza />But in a test we’re passing a custom implementation, that returns mock data instead:
import React from 'react';
import { render, screen } from '@testing-library/react';
import userEvent from '@testing-library/user-event';
import RemotePizza from '../RemotePizza';

const ingredients = ['bacon', 'tomato', 'mozzarella', 'pineapples'];

test('download ingredients from internets', async () => {
  const fetchIngredients = () =>
    Promise.resolve({
      args: { ingredients }
    });
  render(<RemotePizza fetchIngredients={fetchIngredients} />);

  userEvent.click(screen.getByRole('button', { name: /cook/i }));

  for (const ingredient of ingredients) {
    expect(await screen.findByText(ingredient)).toBeInTheDocument();
  }
});
Dependency injection is great for unit tests, when we’re rendering a component that accepts an injection directly, but for integration tests it needs too much boilerplate to pass dependencies to deeply nested components.
That’s where request mocking comes in.
Mocking is similar to dependency injection in a way that we’re also replacing a dependency implementation with our own in a test but it works on a deeper level: by modifying how either module loading or browser APIs, like fetch, work.
With jest.mock() we can mock any JavaScript module. To make it work in our case, we need to extract our fetching function to its own module, often called a service module:
export const fetchIngredients = () =>
  fetch(
    'https://httpbin.org/anything?ingredients=bacon&ingredients=mozzarella&ingredients=pineapples'
  ).then(r => r.json());
Then import it in a component:
- const defaultFetchIngredients = () => fetch('https://...').then(r => r.json());
+ import { fetchIngredients as defaultFetchIngredients } from '../services';
And now we can mock it in our test:
import React from 'react';
import { render, screen } from '@testing-library/react';
import userEvent from '@testing-library/user-event';
import RemotePizza from '../RemotePizza';
import { fetchIngredients } from '../../services';

jest.mock('../../services');

afterEach(() => {
  fetchIngredients.mockReset();
});

const ingredients = ['bacon', 'tomato', 'mozzarella', 'pineapples'];

test('download ingredients from internets', async () => {
  fetchIngredients.mockResolvedValue({ args: { ingredients } });

  render(<RemotePizza />);

  userEvent.click(screen.getByRole('button', { name: /cook/i }));

  for (const ingredient of ingredients) {
    expect(await screen.findByText(ingredient)).toBeInTheDocument();
  }
});
We’re using Jest’s mockResolvedValue method to resolve a Promise with a mock data.
Mocking the network is similar to mocking a method, but instead of importing a method and mocking it with jest.mock(), we’re matching a URL and giving a mock response. And it works on the lowest level, so network requests, sent using fetch or XMLHttpRequest, will be mocked.
We’ll use Mock Service Worker to mock the network requests. It works in the browser and in Node.js, which makes it possible to reuse the same mocks in unit tests, React Styleguidist or Storybook.
To setup Mock Service Worker, we need to define mock handlers for all our network endpoints:
import { rest } from 'msw';

export const fetchIngredients = [
  rest.get('https://httpbin.org/anything', (req, res, ctx) => {
    return res(
      ctx.json({
        args: {
          ingredients: ['bacon', 'tomato', 'mozzarella', 'pineapples']
        }
      })
    );
  })
];
Then setup a server that imports all our mock handlers:
import { rest } from 'msw';
import { setupServer } from 'msw/node';
import { fetchIngredients } from './mocks/fetchIngredients';

const server = setupServer(...fetchIngredients);

export { server, rest };
And then we can use this mock server in our tests):
import React from 'react';
import { render, screen } from '@testing-library/react';
import userEvent from '@testing-library/user-event';
import { server } from '../../mocks/server';
import RemotePizza from '../RemotePizza';

const ingredients = ['bacon', 'tomato', 'mozzarella', 'pineapples'];

beforeAll(() => server.listen());
afterEach(() => server.resetHandlers());
afterAll(() => server.close());

test('download ingredients from internets', async () => {
  const user = userEvent.setup();

  render(<RemotePizza />);

  await user.click(screen.getByRole('button', { name: /cook/i }));

  for (const ingredient of ingredients) {
    expect(await screen.findByText(ingredient)).toBeInTheDocument();
  }
});
Here we’re starting the mock server before running the first test and stopping it after running the last one. We’re also resetting mock handlers before each test, so we could customize handlers in a particular test to verify different scenarios, for example, and error case.
To summarize the difference between jest.mock() and Mock Service Worker:
jest.mock()is already available with Jest and we don’t need to set up and learn anythingnew — it works the same way as mocking any other module, however it dependes on the implementation of service modules and may break tests when the implementaiton changes.- Mock Service Worker has a specialized API to describe network requests and responses, and debugging tools to help us when something isn’t working. It’s easier to customize responses for particular tests. It also works the same way in the browser and Node.js so we could reuse mocks.
Debugging
To check the rendered React tree, use the debug() method:
render(<p>Hello Jest!</p>);
screen.debug();
// -> <p>Hello Jest!</p>
We can also print an specific element:
screen.debug(getByText(/expand/i));Resources
- Jest cheat sheet
- Common mistakes with React Testing Library
- Stop mocking fetch
- Which query should I use?
- Inherent roles of HTML elements
Conclusion
We’ve learned how to set up React Testing Library and how to test different React components. We’ve learned how to setup Mock Service Worker, and use it to test components that make network requests.
Thanks to Joe Boyle, Kent C. Dodds, Anna Gerus, Patrick Hund, Monica Lent, Morgan Packard, Alexander Plavinski, Giorgio Polvara, Juho Vepsäläinen.